Tuesday, October 12, 2010

D.I.Y - ELECTRICAL EXTENSION PLUG

Salam & hi to all,

this few days, i am really in the mood for home improvement and D.I.Y thing. just bought myself a new electrical driller that 'rocks' haha (actually having more function than the current driller i am having) and an electrical saw !! i was really excited! but when i was beginning to start my work at my car porch, my electrical extension plug has put me down. its less than 5 meters and couldnt reach the plug inside the house. therefore, i couldnt switch on my electrical saw :(

enthusiastically (actually the right word is impatiently) i went to my favorite hardware shop, bought the things required to do my very own 20 meters electrical extension plug.

so, i want to share with you how i made it.

you are going to need :-
the head

the body

3 cord wire cable (any length measurement is up to you)

electric guide (normally it comes with the 'head' when you purchase it), screw drivers (straight and star shape) and a cable cutter (in case you dont have it in your tool box, you can use a normal pair of scissors)


PROCEDURES
PART 1
we do the 'body' first as it is a bit tedious than the 'head'. examine the 'body', check the internal parts.

check the bottom of the box of the 'body'. you will find a circular mark as shown in the photo.

you can poke to make a hole, or using a sharp knife to cut it open. the area of the circle is actually thinner thus its not so difficult to cut it open.

measure the cable to a specified length. cut off the outer layer (grey color) for 2 inches.

you will see there are 3 different colored cord with white cotton tread. separate the tread from the cord, and cut it off.


using the cable cutter, cut off the outer layer of the copper thin wires, about 0.5cm.

take the box with the hole made just now, and put the cable through it as shown in the photo. that is the cover of the lower part of the 'body'.

now, to insert the appropriate cords to the right places. check the black plate on the 'body'. its hard to see in the picture but if you look closer, its written/stamped the alphabet L=live cord that comes in brown/red color. E=earth cord, greenyellow or green color, and N=neutral in blue or black. notice that there is no fuse exposed in this device. maybe there is inside the bulging black component.

after inserting the exposed wires of the cord according to their appropriate places (small holes), then tighten up the screw nail that is placed in a small holes to squeeze in the wires tightly in it.

this is how it looks like, not ready yet.

close the box and tighten the screw nail as shown in the photo.


PART 2
open the 'head'. its easier. make sure that the fuse is ok. normally it comes together with the 'head'. if the 'head' is not working, dont throw it yet, just change the fuse. fuse receives the electrical current just like our real head, where the fuse=brain receives the knowledge and energize us. anyway, just follow the guidance as shown in the photo.

ok, all cords are nicely inserted and screw nails are tighten.

hmmm...bad cord arrangement, why? because the most important hole is being blocked by one of the cord.

this is the correct way. notice that the hole is exposed and the 2 parts can be closed.

tighten the screw nail.


its COMPLETE !

test it. if you see the light (at the 'body') is on, then the device is working.

i know dealing with electrical devices is not something fun to do. i myself was and still am afraid to handle the cables and wires, especially when switching on the plug. why? because when i was small, i had been once, shocked with some circuit of electric current, please dont ask me what number of voltage/kilowatt haha.. now, i would find any wooden ruler or any plastic stick to press the button to switch the plug on. can you believe that? i know the only way to overcome this phobia is to 'force' myself to 'dirty my hands' into this experience. insyaAllah, for this kind of phobia, i hope i would 'recover' fast haha..

dont try to be a mac gyver yourself, please consult any electrician if you intend to try this at home incase this is your first trial. always remember, safety comes first.

good luck!

Sunday, October 10, 2010

CAT'S PHYSIOTHERAPY

Salam & hi to all,

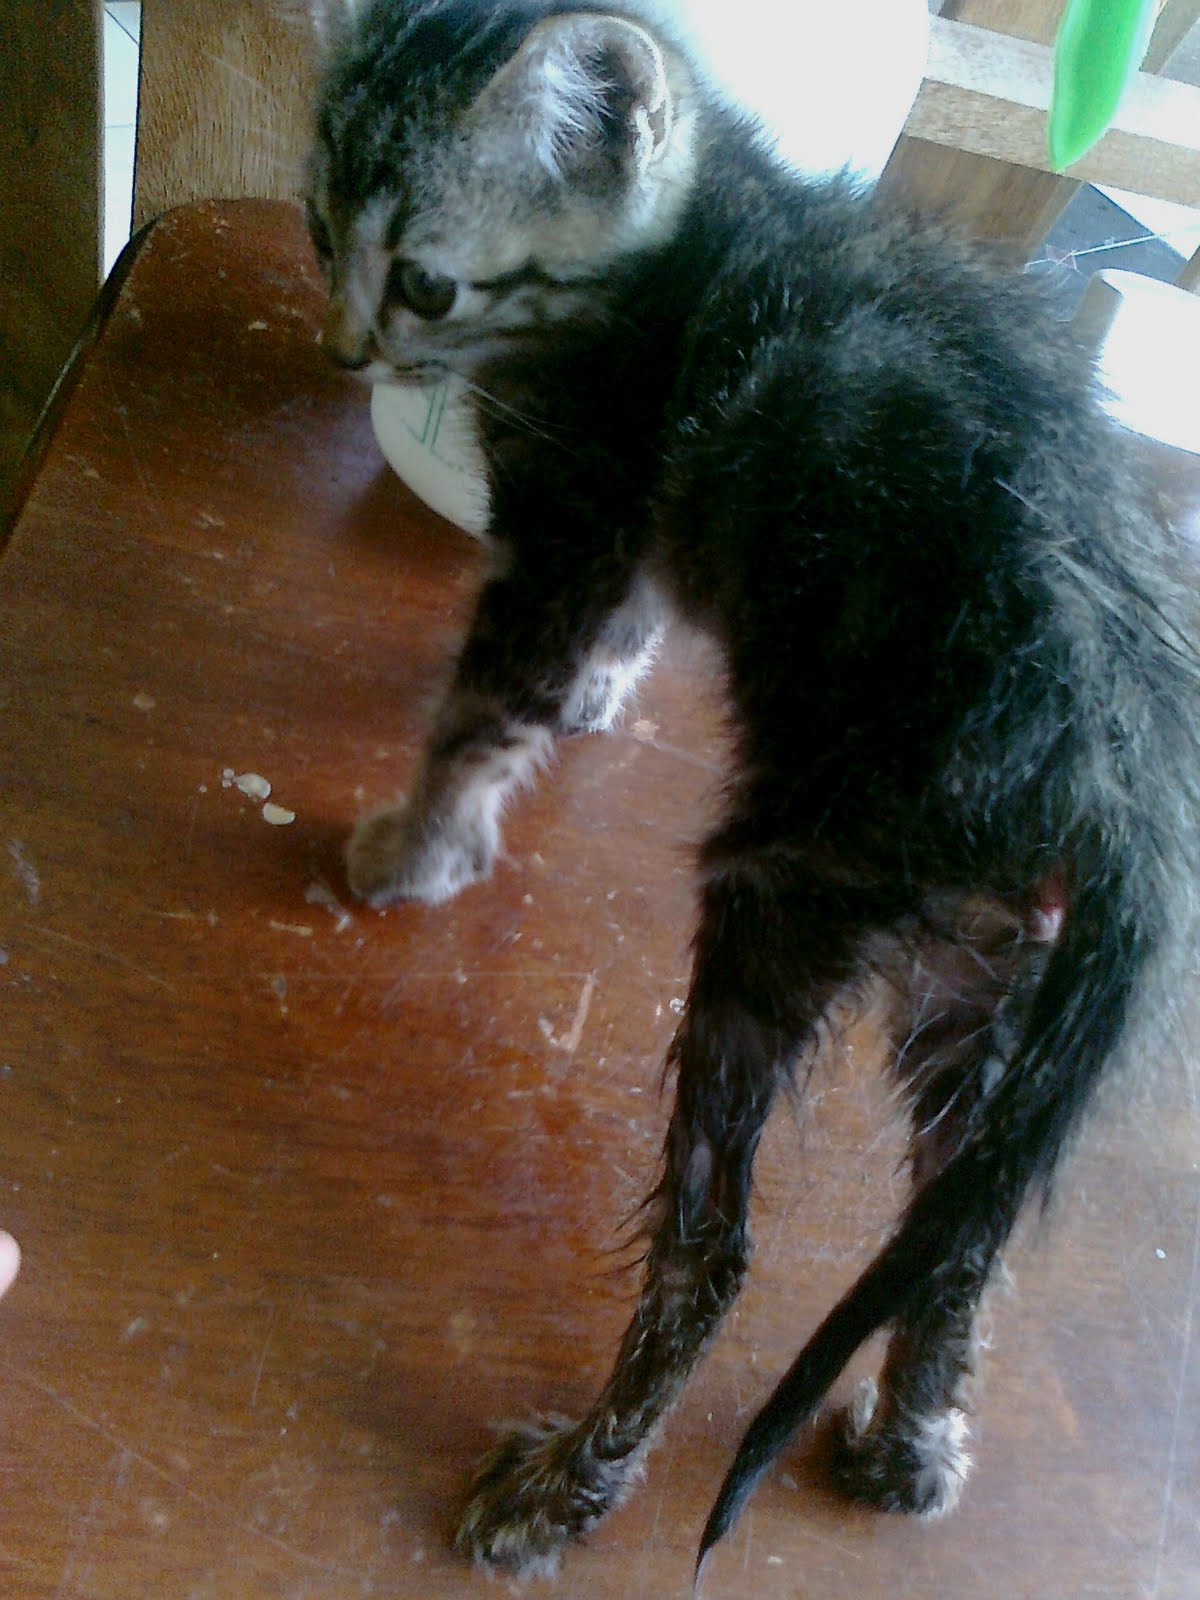
despite of having 'grumbles' over my naughty cats, i adopted another kitty and for this stray one, i was obliged to do it..why? he was furiously bitten at his lower back and about to be killed by a neighbor's male cat. he is just barely 3 weeks of age!

my heart was trembling to see how badly injured he was, crippling with the 2 hands, and was scared, trying to hide behind the boxes at my back yard. it was last week actually. we sent him to a vet, and i was told that the chances for him to recover to normal condition was very slim. there wasnt any bone fracture, but the vet was worried about having any severe injury at the spinal. i was stunned when she suggested to put him to sleep. after taking the prescription and paid the medical bill, i carried the little kitten as if i had just given birth to him. from his eyes and the way he looked at me, notwithstanding the pain he suffered, i know his spirit to live was strong and he needed me.

his eating appetite is good, and he poo and pee at whenever he sits. so you can imagine how dirty the groin area is.

i have decided to keep him and give him some physiotherapy, my way and my style. look at his legs, he is half 'vegetable'.

at first i washed the tail, groin and let the tap water flow through his 2 legs. the purpose is for him to feel the changes of the temperature. i wanted to see his reflex. i saw some movement. that was a good indication that he could walk again. wiped his wet fur and put him on the table.

then i pulled each leg slowly and gently. when i let go, i can see that he pulled back his leg. that was another good indication.

then i lifted both of his legs to see his respond. this time he didnt respond. maybe the muscle was tensed, i hope i didnt hurt him.

next, i gave him a gentle massage on his back, especially the area he was bitten. he seemed to like it veeeeeeeery much haha...

i lifted his stomach as shown in the picture, to support his body to walk. he could barely stand on the 2 other legs.

this boy showed the spirit to walk. i saw he was struggling.

look at him. how am i proud of him.


now to check his ability to grip. this is my cats tree i built with a friend 2 years ago.

only one leg was able to hold/make a grip. the other one is still very weak i guess. we need to repeat this exercise for the next 2 days.

after the physiotherapy session, i pad his head, told him how happy i was to see his progress. i think cats need to be motivated as well.

actually he got his name at the vet when the clinic assistant asked me his name for the registration purposes. i named him SYIFA' and it means to heal.

between both of us, there is an intuition that makes me love him like the other cats i have and i do believe, with Allah SWT will, this kitty will walk again, insyaAllah :)

Saturday, October 9, 2010

D.I.Y - HIGH TABLE

Salam & hi to all,

Alhamdulillah, my late dad has taught me many things about construction works. i remember helping him to complete our house in Kuala Kangsar when i was 12. he asked me to climb a 13 feet of height beam to catch the bricks he threw from below. being a bit boyish during my youngster years, playing with hammer, nails and climbing trees were my normal activities after school. if i didnt take up accountancy as my major in university, i think i would be a carpenter or civil construction contractor by now haha..

now, apart from the pharmacy, hardware shops is one of my favorite places to visit. i would be like a monkey in an orchard, to see any sophisticated working tools such as bosch and other 3 in 1, or 5 in 1 functions of tools. i know this is crazy.

ok, enough about theoretical stories. lets go to the practical. i want to share with you on how to make a high table.

here we go, you are going to need...

WORKING TOOLS
make sure your hands are dry, and when changing the driller blade, switch off the electrical switch to avoid any accidents.


ONE LEGGED STAND

bought from ikea. it comes in 3 parts, the adjustable leg, a plate and a cover


TABLE TOP
4 x 1.5 feet..also from ikea. actually you can get any measurement of table top but i guess it wont be much stable if its too big (you can use an unused solid door and cut it into a smaller measurement - not necessary from ikea)


PROCESS
STEP ONE
put on the plate as shown in the picture. tighten it well.


STEP TWO
press the plate to make sure it is really tight.


STEP THREE
with the upside down position, put the plate (that holds the stand) at any desired position leaving an adequate edge of the table top. use suitable screw nail (as long as the screw nails wont go exceeds the top surface of the table top)


STEP FOUR
tighten the screw nails from the plate onto the table top.


STEP FIVE
put the cover of the stand (actually this is not necesssary, since it cant really be seen from above the table top, this process can be omitted)


STEP SIX
drill 2 holes on the wall, put the wall pluck. drill 2 holes as well on a piece of medium wood plate (any measurement). put a suitable screw nail to each holes and tighten the screw. this is to support the table top. (sorry no pictures on the drilling works, as my 2 hands were fully occupied)


STEP SEVEN

put the table top which edge leans on top of the small wood plate.


STEP EIGHT

nail the edge of the table top (can use normal 1.5 inches wood nails or screw nails)


VIEW
from beneath the table

from side


ITS DONE !

get a high chair to match with the table. cute and nice.


if this is the first time you ever hold/use an electrical driller, please pay extra cautious, read the manual first and do it slowly. its advisable to ask some experienced person in this field to observe you while working, in case you are unsure in some steps. be confident of your self and good luck!